Splunk is a powerful software platform that enables organizations to collect, analyze, and visualize machine-generated data from various sources in real-time. It is widely used in IT operations, security, and business analytics to gain insights into the performance, availability, and security of their systems and applications.
In this tutorial, we will walk you through the steps to install Splunk on a CentOS system. We will cover the prerequisites for installing Splunk, downloading and installing the software, and configuring it to run as a service.
By the end of this tutorial, you will have a working installation of Splunk on your CentOS system that you can use to start collecting, indexing, and analyzing your machine data. So let’s get started!
Requirements To Install Splunk on CentOS 8.5
The first thing to do before you download and install the latest Splunk Enterprise package is to check your OS architecture. In order to run Splunk on your local or hosted CentOS 8.5 machine, you need a 64-bit architecture. Use the following command to check on that:
[root@bitsio1 ~]# uname -r
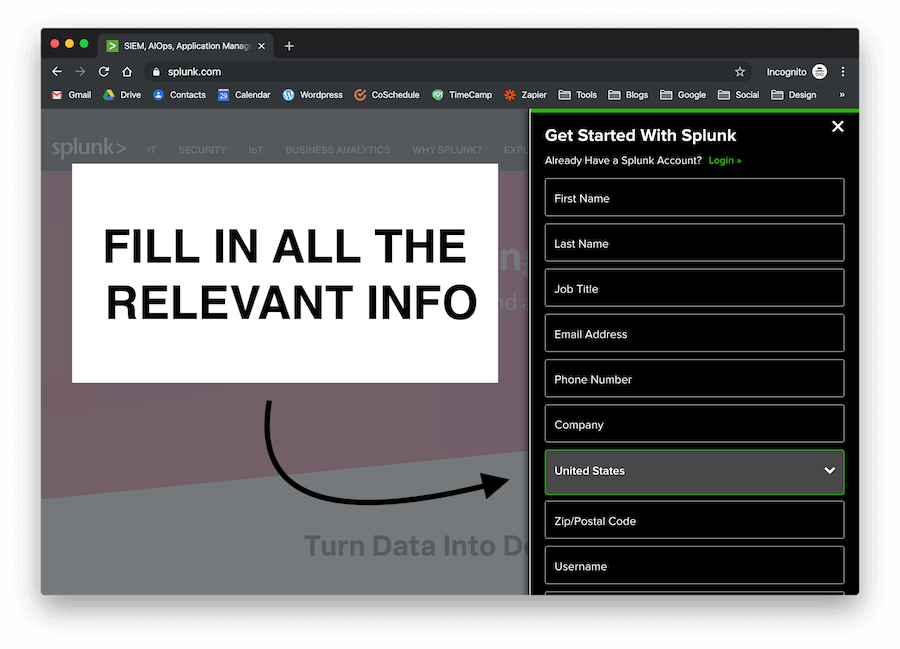
Once you’ve confirmed that your server runs on 64-bit architecture, you can start the installation process, but not before you’ve created your own Splunk account. Head on over to Splunk’s website and click on the big “Free Splunk” button in the top right corner:

You’ll see another screen slide in from the right, asking for your signup information:
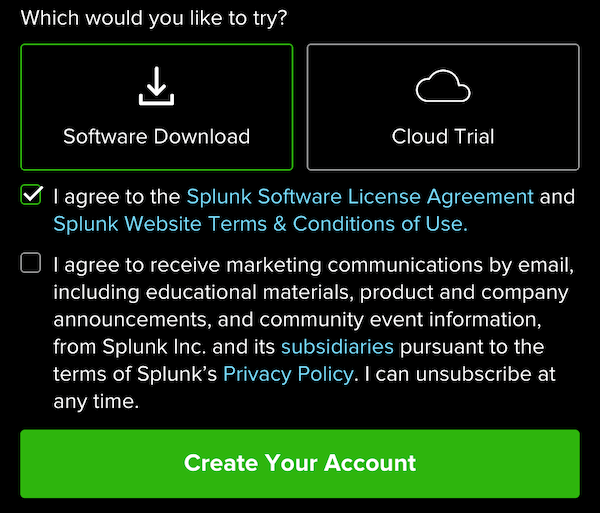
Once you’re done with that, select the “software download” tab, make sure to accept the Splunk Software License Agreement, and create your own account:
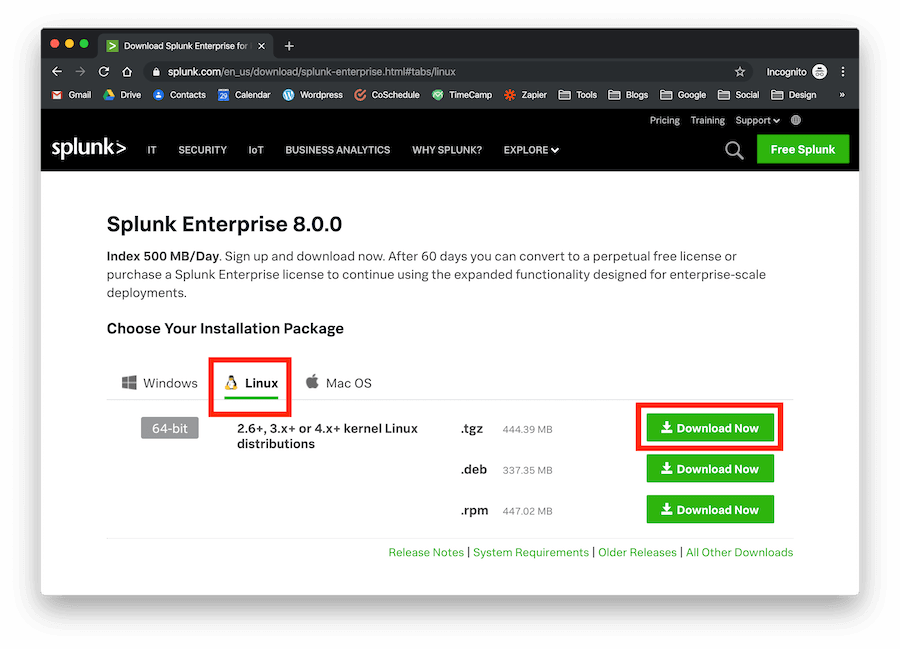
After 10 seconds or so, you’ll be redirected to the download page. Here you’ll see various tabs with options for Windows, Linux, and Mac. Select the Linux tab and download the .tgz file to install Splunk Enterprise on your CentOS 8.5 machine:
As you wait for the download to complete, you should set up your environment by creating a new group and user. We do not recommend installing Splunk on your root directory. The setup process is fairly straightforward, and it only involves a few commands to get started:
[root@bitsio1 ~]# groupadd splunk [root@bitsio1 ~]# useradd -d /opt/splunk -m -g splunk splunk
This is standard across Splunk implementations. Of course, you can name your group and user however you want, but we recommend naming it Splunk for simplicity.
4 Crucial Steps To Install Splunk on CentOS 8.5
Once the download process is finished, and you have your Splunk Enterprise .tgz file at hand, it’s time to unpack and install the entire package onto our new user.
Do not proceed if you haven’t created a new user already. You can check whether the operation was successfully completed or not by switching to the user with the following command:
[root@bitsio1 ~]# su – splunk [splunk@bitsio1 ~]$
(If you do so, go back to the root user to extract the downloaded package)
Here’s how you install Splunk on CentOS 8.5 in 4 simple steps:
1. Extract the .tgz file using the following command:
[root@bitsio1 ~]# su – splunk [splunk@bitsio1 ~]$
As you can see, the latest version of Splunk at the time of writing (October 2019) is version 8.0. Double-check everything and run the command.
You’ll get the list of directories included within the compressed .tgz file on your screen. Once you’re done with extracting the files, you can start copying them onto the new user.
2. Copy all content extracted from the root user to the splunk user:
[root@bitsio1 ~]# cp -rp splunk/* /opt/splunk/
This is fairly straightforward as it’ll copy all previously extracted directories onto the new splunk user. This separates the Splunk implementation from the rest of our machine, securing the rest if something goes wrong with the software.
3. Change ownership to the new Splunk user:
[root@bitsio1 ~]# chown -R splunk: /opt/splunk/
Again, fairly straightforward.
4. Switch users and install Splunk:
[root@bitsio1 ~]# su – splunk [splunk@bitsio1 ~]user@computer$ cd bin [splunk@bitsio1 bin]user@computer$ ./splunk start –accept-license
Finally, we can install Splunk onto our local or hosted CentOS 7 machine. Switch onto the new user, change directory to bin (you can also use the ls command to list the directories available and get used to the Splunk implementation), and run the command shown above to accept Splunk’s license.
If you want to go through and read the license before accepting (we recommend you do so), simply run ./splunk start and leave out the –accept-license argument. Then, once you’re ready to continue, rerun the full command, enter an administrator username, a new password (confirmation required), and boom, you’re done.
Once you’ve created your own username and password, the installation process will run in full and, at the end, the terminal will display the URL which you can visit to log into Splunk:
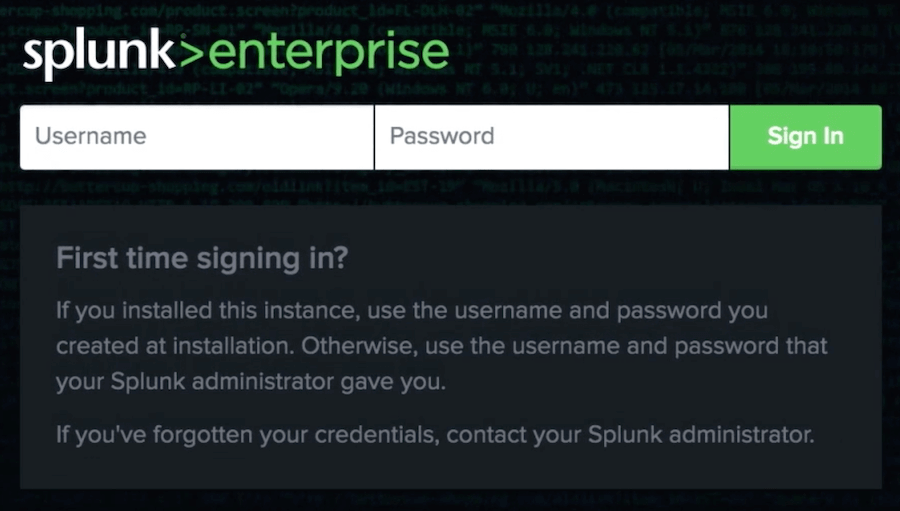
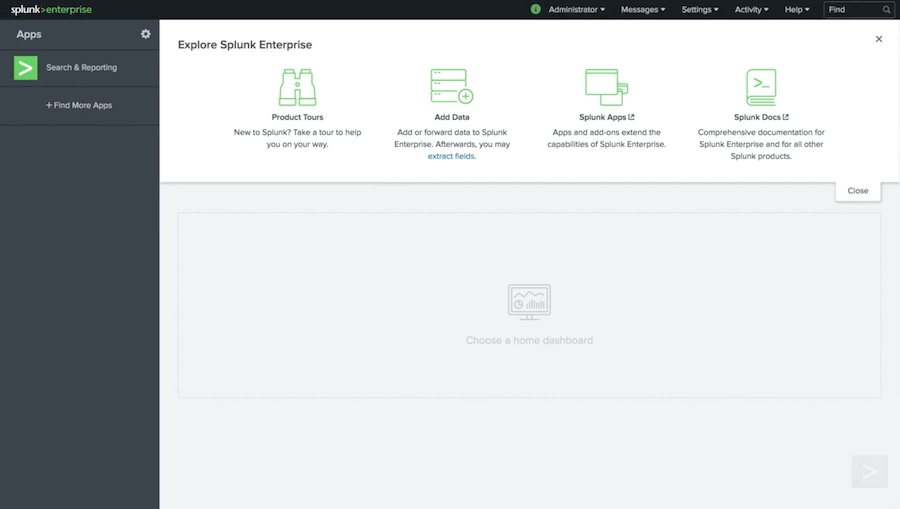
Use the username and password that you just created to log in and you’ll be greeted with the Splunk web interface, shown below:
Get More Updated From BitsIO
Don’t know what to do here yet? Stay tuned for more tutorials from the bitsIO team! We’re going to tackle more advanced topics regarding Splunk, big data, and enterprise security soon. In the meantime, enjoy your fresh install of Splunk on CentOS 8.5 and don’t forget to share this tutorial with anyone who could benefit from a step-by-step solution!