If you work in cybersecurity, you’re probably familiar with the term “RBA” – or “Risk-Based Authentication.” RBA is a method of authentication that uses risk factors to determine whether to grant access to a user or not. It’s a powerful tool for enhancing security, especially in high-risk environments.
But how exactly does RBA work, and how can you get started with it in your organization? In this blog post, we’ll explore the basics of RBA, including what it is and how it works. We’ll also dive into how you can get started with RBA using the Enterprise Security (ES) app in Splunk.
By the end of this blog, you’ll have a better understanding of RBA and the tools you need to implement it in your organization.
Understanding Risk-Based Authentication (RBA)
Have you ever tried logging in to a website or app only to be asked to go through multiple authentication steps or remember a complex password? It can be frustrating, to say the least. That’s where Risk-Based Authentication (RBA) comes in.
RBA is a method of authentication that takes into account various risk factors to determine whether a login attempt should be granted access or not. It’s a smarter way of authenticating users compared to the traditional method of using a fixed set of rules or factors.
For instance, RBA can consider factors such as the location, device type, time of day, IP address, and other contextual information when assessing the risk of a login attempt. By doing so, RBA can prevent unauthorized access and reduce the risk of fraud and other security threats.
Another advantage of RBA is its ability to adapt to changing risk environments. If there is a sudden increase in login attempts from a particular location or device type, RBA can adjust the risk score and require additional authentication steps or deny access altogether.
RBA can also make the authentication process easier for users. Instead of struggling to remember complex passwords or going through multiple authentication steps, RBA analyzes the contextual information and decides whether a login attempt is low-risk or high-risk. This helps streamline the login process and makes it easier for users to access the resources they need.
How Does RBA Work?
When a user attempts to log in, RBA looks at various factors such as the location of the user, device type, time of day, IP address, and other contextual information to determine the level of risk associated with the login attempt.
These factors are then analyzed by the authentication system, which assigns a risk score to the login attempt based on the level of risk indicated by the contextual information.
For instance, if a user tries to log in from a device that has never been used to access the account before, this may be considered high risk. On the other hand, if the user is logging in from their usual location and device during a time of day when they typically access the account, this may be considered low risk.
Based on the risk score assigned to the login attempt, the authentication system can then decide whether to grant access or not. If the risk score is high, the system may require additional authentication steps to verify the user’s identity. On the other hand, if the risk score is low, the system may grant access with minimal or no additional authentication steps.
The beauty of RBA is that it’s not a one-size-fits-all approach. It takes into account the unique context of each login attempt and adjusts the authentication process accordingly. This makes the authentication process more user-friendly and reduces the risk of unauthorized access and fraud.
Benefits of Using RBA for Authentication
Using RBA for authentication offers several benefits that can help organizations enhance security and improve the user experience. One of the key benefits of RBA is its ability to provide a more seamless and user-friendly authentication experience.
With RBA, users are not required to remember complex passwords or go through multiple authentication steps every time they log in. Instead, RBA analyzes various contextual factors to determine the level of risk associated with the login attempt and adjusts the authentication process accordingly. This means that users are only required to provide additional authentication steps when the system determines that the login attempt is high-risk.
Another benefit of RBA is its ability to adapt to changing risk environments. Traditional authentication methods rely on static rules and factors to determine whether a user should be granted access. However, these rules may not be effective in a rapidly changing threat landscape.
RBA takes into account various contextual factors, such as the location of the user, device type, time of day, and IP address, to determine the level of risk associated with each login attempt. This means that RBA can adapt to changing risk environments and adjust the authentication process accordingly. For instance, if there is a sudden increase in the number of login attempts from a particular location or device type, RBA can adjust the risk score accordingly and require additional authentication steps or deny access altogether.
Finally, RBA can help reduce the risk of unauthorized access and fraud. By analyzing various contextual factors, RBA can help detect suspicious login attempts and require additional authentication steps to verify the user’s identity. This can help prevent unauthorized access and reduce the risk of fraud and other security threats.
Getting Started
Let us get started with the process of RBA implementation and learn everything in action.
Prepare Existing Instance for RBA
RBA heavily relies on the risk index. Most customers are not currently using this index, or if they are, they are not using the data in a meaningful way.
Run the following search over all time or view the Risk Analysis dashboard (https://YOURINSTANCE/en-US/app/SplunkEnterpriseSecuritySuite/risk_analysis) to see if Risk is really used.
index=risk
Once it is determined the risk index is not useful in its current state you will need to stop all correlations from using the Risk Adaptive Response Action and clear the risk index.
If this is a fresh install of Enterprise Security, you will still need to remove the Risk Adaptive Response Action from all correlations.
Cleaning Correlation Searches
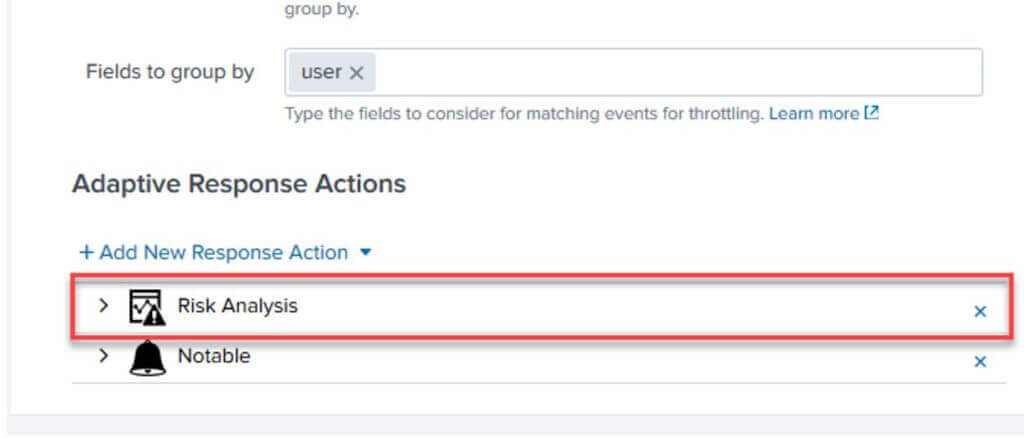
Open each correlation search and remove the Risk Adaptive Response Actions. Do this on all correlations regardless if they are enabled or not to ensure if they are turned on in the future they do not start writing to the risk index.
Cleaning the Risk Index
The second step is clearing the risk index since RBA is going to change how the risk index is used including extending the Risk data model with additional fields.
On a standalone indexer you can use the splunk clean command: https://docs.splunk.com/Documentation/Splunk/8.0.1/Indexer/RemovedatafromSplunk#Remove_all_data_from_one_or_all_indexes
Alternatively, in a clustered environment you can set the frozenTimePeriodInSecs to 1 for the risk index and apply the bundle effectively freezing all the data in the risk index.
indexes.conf
[risk]
frozenTimePeriodInSecs=1
After the bundle is pushed allow time for the Splunk bucket freeze process to run (usually very fast) and delete all the data. Ensure there is no data in the risk index by running an all-time search for: index=risk
Remove the frozenTimePeriodInSecs=1 stanza in indexes.conf and push the bundle again to allow the index to start retaining new events that are sent.
Review CIM Sources and Configuration
Like native Enterprise Security, RBA relies on data in the common information model (CIM). Use a tool like SA-cim_validator (https://splunkbase.splunk.com/app/2968/) to review all data models for valid field extractions and data sources.
Assets & Identities Framework
RBA relies on translating system objects back to the host name and user objects back to the username. Since Risk Incident Rules are run across multiple days a systems IP address may have changed so we need to do real time DHCP translations where possible when the Risk Rules are run.
ES Assets should include all hosts (dns, nt_host) and ip/mac of any static systems (usually servers and hardwired desktops). Priority should be set appropriately as it is used in the risk macros.
Asset and Identity categories play an important role in RBA. Filling these out with important groups or server classes will provide a lot of value when it comes time to start assigning dynamic risk based on object properties. This will provide more fine tuning than priority provides out of the box.
App Installation
Now that Enterprise Security risk index is cleaned up, data sources are validated, and assets/identities are enriched, we are ready to configure base RBA knowledge objects (macros, risk incident rules, risk rules).
SA-RBA contains an updated schema for the Risk Analysis data model. In its current form this new schema is not being used because SA-ThreatIntelligence is still overriding it.
SA-RBA
Contains all the RBA specific dashboards, macros, lookups and correlation searches.
Download from GitHub: https://github.com/apger/SA-RBA/
This app should be installed on the Enterprise Security search head only. Note: This app will override the default Risk data model with additional fields.
Dependencies
Semicircle Donut Chart Viz: https://splunkbase.splunk.com/app/4378/ (Used for dashboards, can be excluded if you want to customize dashboards to your needs)
URL Toolbox: https://splunkbase.splunk.com/app/2734/ (Used in some risk rules, highly recommended to install this on the Enterprise Security search head as well)
Add SA-RBA to Enterprise Security Navigation
From Enterprise Security navigate to Configure > General > Navigation
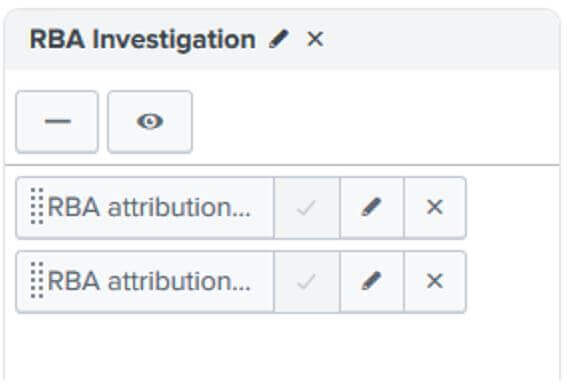
Create a new Collection with RBA attribution – System and RBA attribution – User as views
Summing Up
In conclusion, implementing Risk Authentication (RBA) with bitsIO can revolutionize your business processes and boost efficiency. By leveraging the power of RPA, you can automate repetitive tasks, streamline workflows, and optimize resource allocation.
Keep an eye on bitsIO to read such amazing and helpful blogs in future.